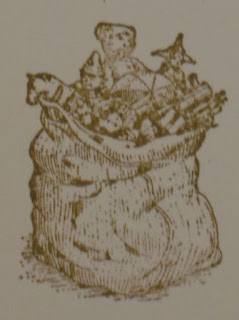
However, this blog is focused on coloring stamped images. Through trial and error, here are my top tips.
Choose the Right Image. Consider the complexity of the image to determine if it is feasible for you to color. To start, sketch type stamps are the easiest. Pictured below are Stampin Up images from the Father Christmas set. These are very detailed and challenging to color every item. This is an image best left stamped in one color or selectively colored (adding just the red).
Stamp more than you plan to use. This includes an extra for mistakes and one for determining colors and technic before starting the project.
Pictured below, the right side shows different greens and purples with markers and watercolor. On the left is my final selection.
 |
| From Stampin Up Circle of Spring Stamp Set |
Choose the right product for the job.
- For the outlines, use a fast drying pigment ink and heat set it before coloring. I use my embossing heat gun for this, but you could also use a hair dryer. I use Memento ink with good success.
From Stampin Up Summer by the Sea Stamp Set - If you plan to use water use watercolor paper. Also consider heat embossing the stamped image to assist in keeping colors in place and the bleeding of the black ink. The image below is done with heat embossing.
- You can use your water based ink pads and markers as watercolor paint. Rub some of the ink in a dish and and dip a wet paint bush or water pen into the dish to creat the color you want. Then just brush onto your project.
- I am no expert on alcohol markers. But use Stampin Up markers because they coordinate with their inks and paper. This makes it easy to tie a project together. They also offer a blender pen to give a watercolor effect as illustrated below.
 |
| From Stampin Up Summer by the Sea Stamp Set |
I hope you find this helpful and please leave me comments on your best coloring tips.
NOTE: All stamped images are copyrighted by Stampin Up. To purchase, go to StampinUp.com or check on Ebay for retired stamp sets.


No comments:
Post a Comment